If your pump.is system controls air suspension, the main screen adds three buttons below the tire controls: Low, Ride, and Advanced.
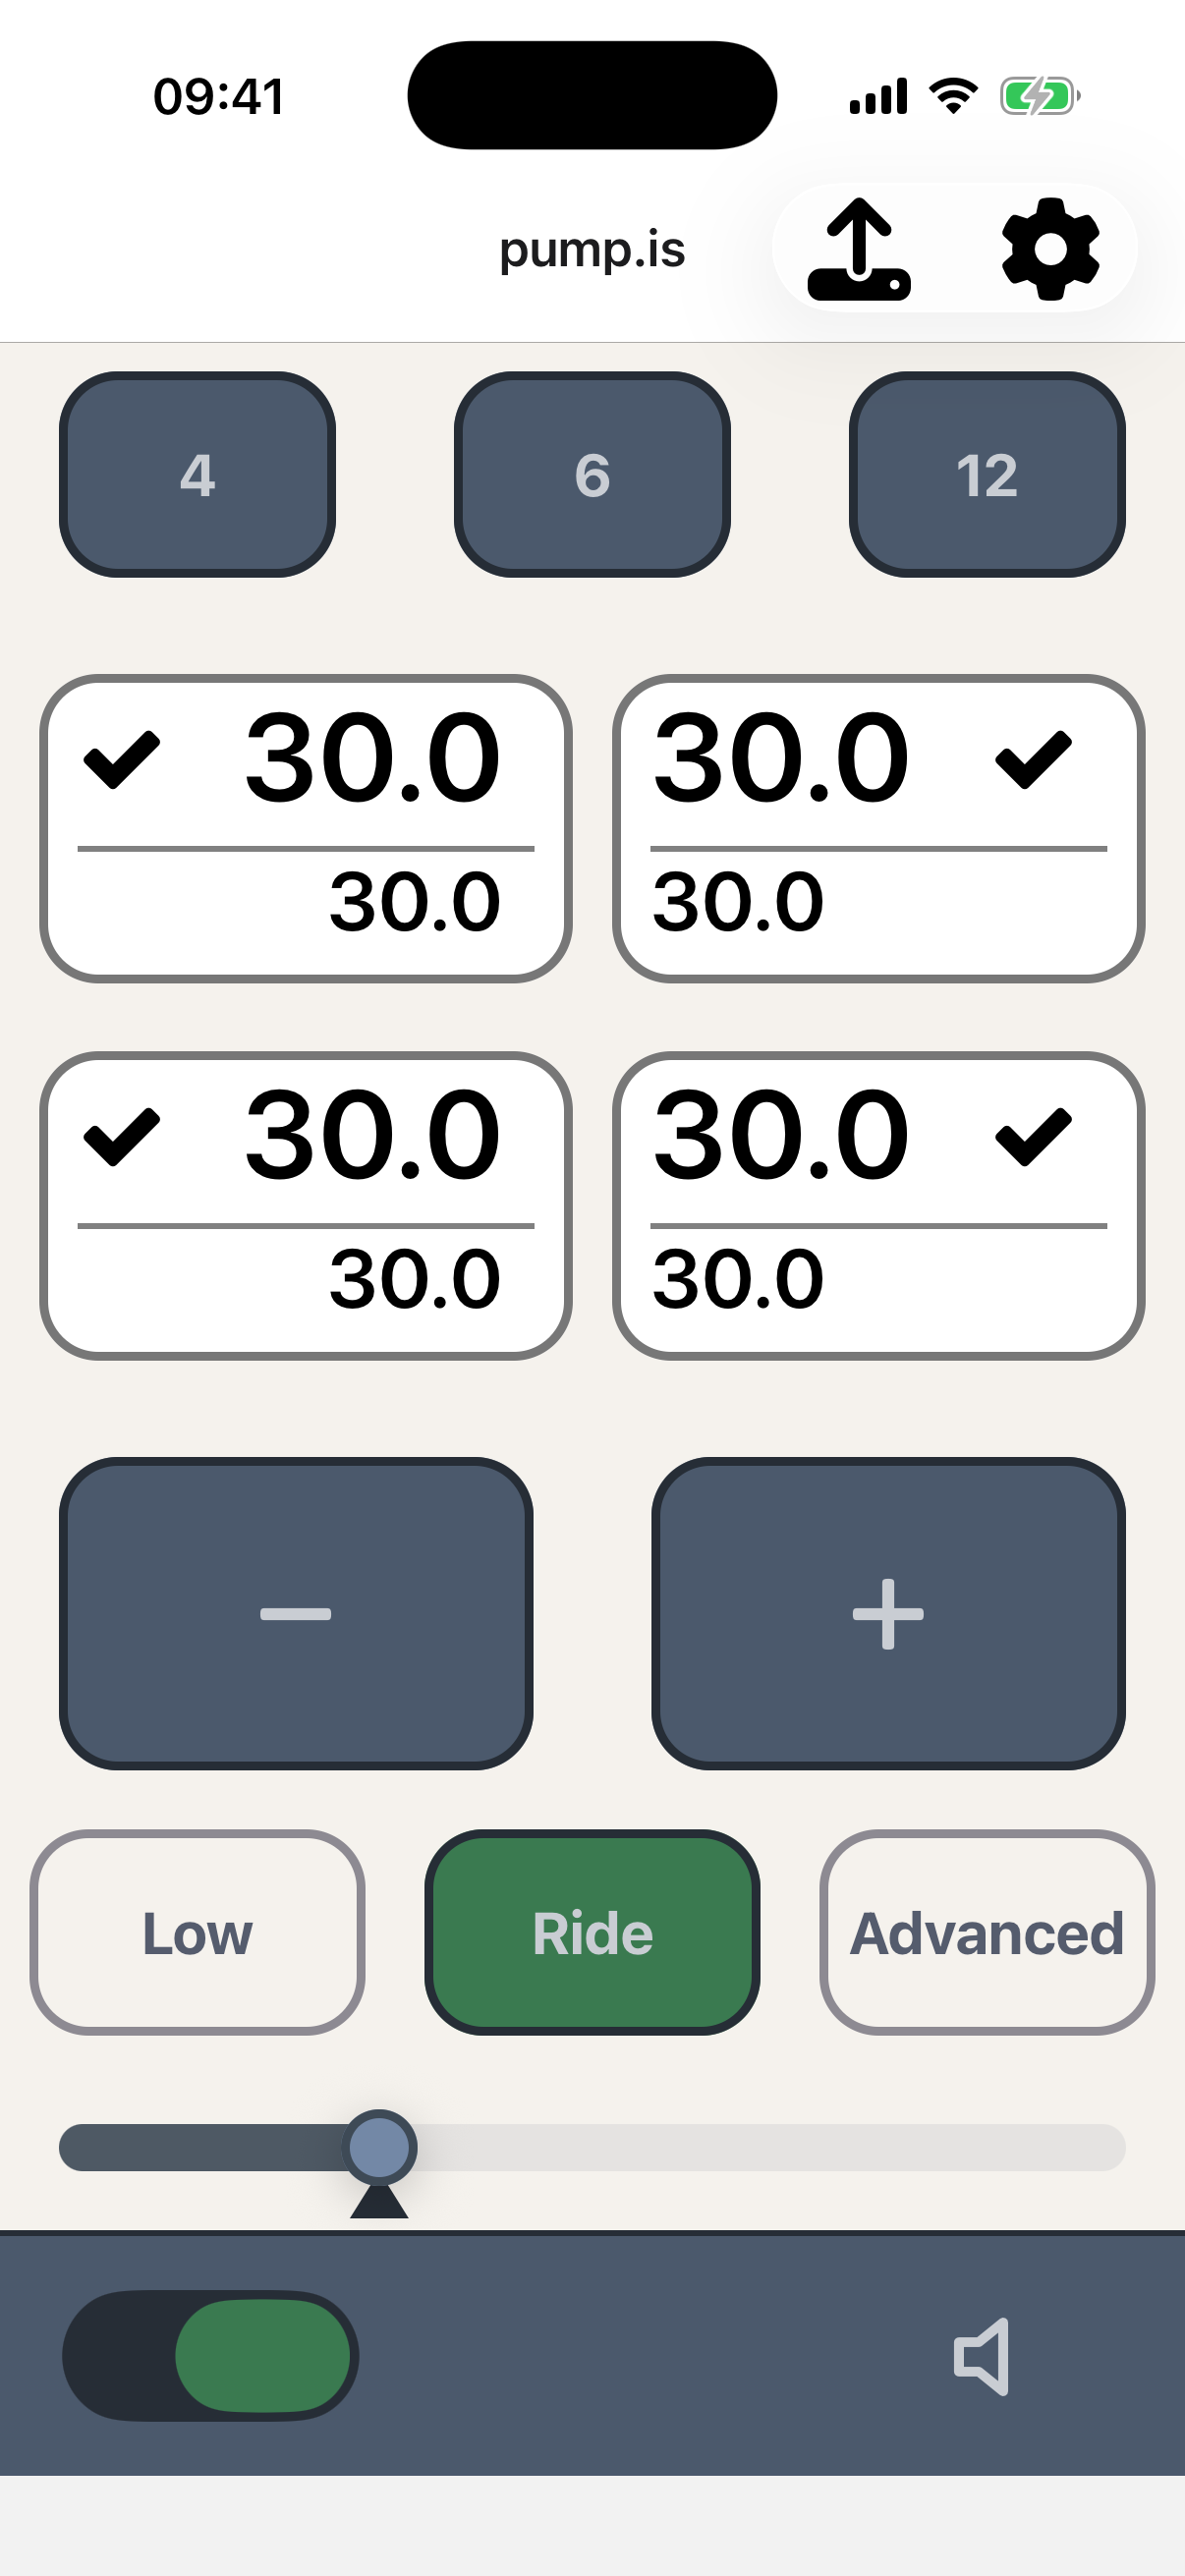
The highlighted button is the current mode. In the bar underneath, the dot is the measured height and the triangle is the target.
Airpad modes
- Low lowers all airpads to their lowest position.
- Ride moves them to the saved ride height.
- Advanced lets you choose an exact height or control individual airpads.
Choosing Low or Ride turns the airpads on automatically if they were off.
For normal use, those first two buttons are all you need: Low when you want the vehicle down, Ride when you are ready to return to the usual driving height.
Advanced height and Ride position
Tap Advanced to set a height from 0 to 100%. Use the slider for a large change or the up and down buttons for a small one.
To save a new Ride height:
- With the airpads on, adjust the height until the vehicle is where you want it.
- Turn the Airpads switch off to hold that position steady.
- Tap Save as Ride.
The next time you tap Ride, pump.is returns the suspension to that saved height. The system ships with a default Ride position, so you only need to do this if you want to change it.
Control individual airpads
The Advanced screen shows one tile for each airpad. Tap a tile to select it; the height controls now affect only the selected airpad. Tap more tiles to make a group, or tap the selected tiles again to return to controlling all of them.
The tile shows its measured height, target height, and current action. The status icons work like the tire icons: a checkmark is idle, arrows mean inflating or deflating, and a question mark means the position is settling.
Locking airpads
Press and hold an airpad tile to lock it. The tile shows a lock and the controller leaves that airpad alone until you press and hold it again.
Use air suspension from the hardware display
The optional display controls the same Low, Ride, and Advanced modes. See Airpads on the hardware display.